Sports Kite Bridle Adjustments
Basic Layout
This is not intended to cover things like turbo, dynamic,active,
cross-active, etc. bridles. For such things, and for more explanation of the "how&why"
of sports kite bridles, you should visit
Ian Newham's
site and Andy
Wardley's site. The purpose of this page is merely to tell you what you can
expect when you make the most basic bridle adjustments.
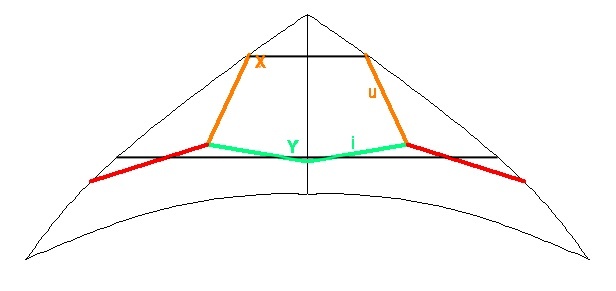
The diagram above shows a simple 3-point bridle configuration. However, the adjustments listed below also pertain to turbo, etc. bridles. I tend to make my bridles, and modify those on bought kites, so that they are adjusted by pigtails at X and Y on the upper outhauls (u) and the inhauls (i) respectively. This is significantly easier than moving prussik knots (especially on cold days or when they have become wet -- or both!), makes it simple to make exactly the same adjustment on both sides of the kite, makes it easier to return to previous settings, and makes it possible to adjust one leg to compensate for an unwanted effect of adjusting the other. If your bridle adjusts only by shifting the tow-point, then use only the top line of the table (upper outhaul,u).
Adjustments
|
| |||
u |
|
| ||
i |
|
|